How we use 3D Printing
Recently we re-animated our Makerbor Replicator and thought it was an excellent opportunity to show the ways in which we use this very handy piece of kit here at Streaker.
One of the most powerful applications of 3D printing is the production of arbitrary designs. In traditional manufacturing, we build up an object by a combination of subtractive and composing operations. Let me explain what I mean by this.
Subtraction Operations
Whether the material involved is wood, plastic or steel (let’s keep it simple!) one way to produce an object you need is to perform a series of subtractive operations- drilling, boring, cutting, shaving, etc. You can spin a piece on a lathe and produce a radially symmetric shape, or use a jigsaw to cut out a curve in a thin sheet of material.
Composing Operations
One you’ve produced a number of pieces using subtractive operations, you might like to then compose those pieces to produce a more complex composite object. This composition can take place using fasteners such as nails, screws or bolts, or can be achieved with adhesives. Magnets are another way to achieve this in a less permanent fashion. I’m sure you get the idea.
To a simplified degree, these methods are responsible for much of the manufactured world. However, one significant drawback of this method is that the more complex the desired object, the more steps are required in order to manufacture it. Each of those steps has the possibility of impacting every other part of the object- for example, moving a drill hole by 5mm requires the same hole on its mating piece to also be moved by 5mm.
Some shapes are harder to form than others. A straight cut is straightforward (pun intended) but arbitrary curves are another matter. It is here that we start to see the benefits of 3D printing- if you can make the shape in your design software, you can make it in the real world, obviously with some limitations.
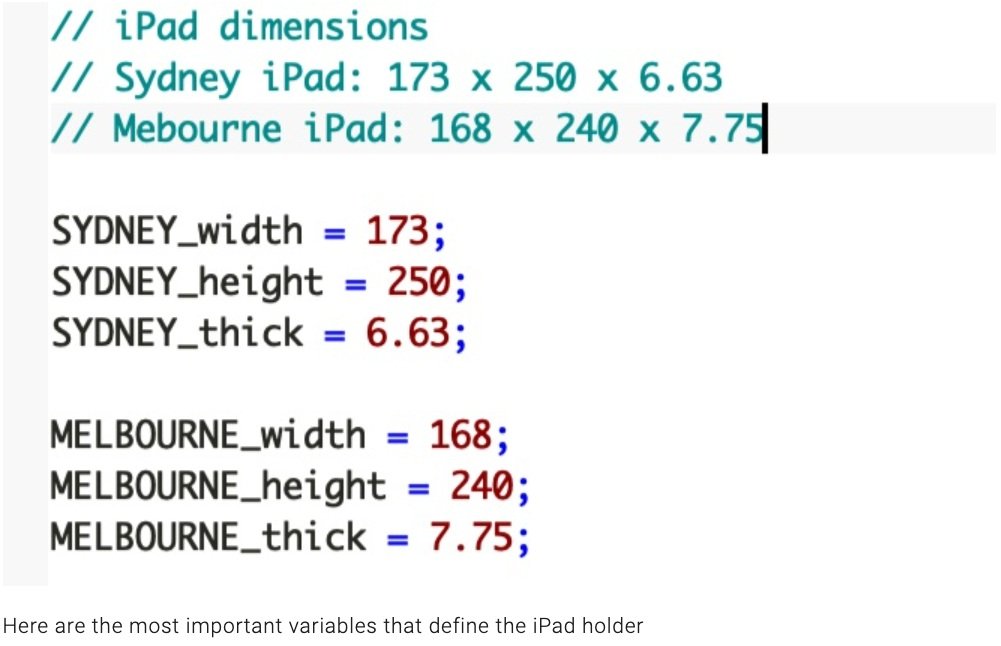
I’m a big fan of parametric design. By defining the dimensions of an object using variables, it’s possible to change the value of those variables and have the changes be reflected throughout the model. Here’s an example- on some of our robots we use a custom designed and 3D printed iPad holder. iPad dimensions change over the years, and as such it’s useful to have a parametric design so that creating a holder for a new iPad is as simple as using the correct dimension for that iPad.
Another benefit of the parametric approach is it’s straightforward to make corrective changes to a design. You’ll notice that in the image above the ‘claws’ of the holder are a little too big. I also found the fit a little tight. This is often the case with 3D printed models; it’s sometimes prudent to vary slightly oversize an opening because of the nature of the plastics used. The good news is that with a couple of simple tweaks the object can be iterated:
With the design iterated, it is printed and tested in place.
This is just one of the applications of 3D printing at Streaker. Again, what makes a 3D printer so powerful is the ability to create arbitrary shapes. Whenever we need a custom part (and it can be plastic) for a robot or an activation, it’s almost always easiest to fabricate it ourselves.


